Saturday, March 26, 2011

Rc Flip Head Lights DIY step by step

Finally, I got myself motivated to make this DIY Flip Lights. I been ask several times to make another DIY flip lights this time I took some pictures :lol:

I will be using a recycled Onevia body, I got from my friend.

The DIY is really simple and it can be applied to any other bodies.


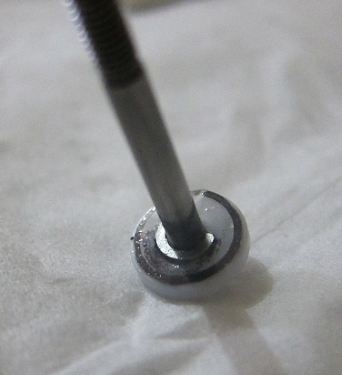
Part: One Assembly rod

Cut off an opening for the new buckets make sure its straight.

* for Trueno AE86 body follow the outline of the lid and save the Lids*


Insert the push rod into the antenna straw then bend the rod into V shape

Place the assembly rod inside the rc body for measurements

Once you have the right measurement bend the other end of the rod into V shape


Place the assembly rod inside the body and either use tape or hot glue to hold in place temporarily


Now glue hot glue or tape the Lid on the V shape rod


Check if everything is aligned


Do a manual flip test :D


Now you can permanently epoxy the antenna straw and the Lids :mrgreen:


Part: Two Light buckets

Here's my version for light buckets, you need to make a triangle and for the width measure the opening in the body


Glue the bucket with the lid temporarily


Check for alignment and glue pemanently


Cut little cardboard triangles for the side of the buckets
I painted them with black markers and glue them on the sides of the buckets


Outline the front lens with a black marker


Important !
Add a piece of straw on the end of the assembly rod to prevent from moving


Part: Three Servo arm

You need a servo arm for the light bucket


Glue the arm on the side of the light bucket


You need a servo push rod for final piece bend the ends

Measure the length and where you want place the servo


Install one end of the push rod to the light bucket


Do the same on servo


Placed the servo on an angle where the wheels are free to move


Run the servo wire on the side where the receiver for easy access


Your Done! :D


* adding lights is another story * :lol: :lol: :lol:

Visit our Forum thread and share your project @ RcDriftRevolution.com


Friday, February 18, 2011

D-Style KE70 rc body

Here's my latest project KE70 rc body.
I been wanting to do this project but, the sources are limited.
Finally, I made it happen and I'm happy with the result..


You can follow my thread D-Style KE70


Saturday, January 29, 2011

Nissan GLORIA 330 SGLE Body

Nissan GLORIA 330 SGLE Body
Release date in mid-February


More here

Tuesday, January 11, 2011

Street Jam OTA-R3X ready to run kit

Street Jam OTA-R3X the most expensive RTR on the market for rc drifting.

Were talking about 180000 yen that's about $2,165.82US dollars WOW!


---> forum discussion here

Monday, January 10, 2011

Fijon (enroute) Cyclone TC05 - D

Here's our new project car Cyclone TC05 - D

I'm using the clone Fijon (enroute) TA05 upgrade kit from ---> Here

All I did is drill a new holes for the cyclone drivetrains and fabricate the top decks and steering system

Were just waiting for the set of new belts from this guy ---> Here


more info here of the --> Cyclone TC05 - D


Friday, October 29, 2010

Fijon enRoute JXR-1 Drift Kit Countersteer Ready


2010 Japan hobby show, enRoute introduce their latest front midship motor mount drift kit called Pisces.

But it will be officially launced in Nov 2010 as JXR-1 (Official Name)
in Japan.

JXR-1 Drift Kit Countersteer Ready, it's an upgrade kit for Tamiya TA05

more info here @ RcDriftRevolution forum thread

Hamster82's Secret DIY Shock dampers !

Here's a Secret DIY Shock dampers from RcDriftRevolution thread info here

The purpose of this mod is to have a shock damper that have Soft compression but Hard rebound.


This great tuning for Countersteer Rc Drifting soft damper suspension setup.

Things you need

Permanent Fine Tip marker
Clear plastic sheets

Scissors
30 wt silicone oil

Link- Video Demo for soft damper setup

Step by step link - Secret DiY shock dampers


Step by step link - Secret DiY shock dampers